Nanacast Product Quickstart
Create a basic Product
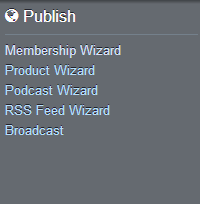
- Login to Nanacast. From the meu, click Publish >> Product Wizard
- Type Product Name, Publisher Name, and Customer Service email. Note that these are the only required fields for this step. All other features on this step are optional.
Complete the Nanacast.com-Hosted Sales Page box if you plan to use it. You can paste in HTML generated by your favorite HTML editor application or use the provided HTML Editor.
Complete the Head Tag HTML Code box if needed. Otherwise, after completing the Product Wizard, you’ll have the option to create an order link, buy now button, or form to place on your own website sales page.
After completing any optional steps desired, click the bottom button to Continue To Next Step
- The next page is the Edit Pricing and Delivery page. All of these settings are optional and editable later. Here you can select your Payment setting (Free or One-time payment vs. Subscription) and your pricing strategy. The major options on this page include:
- Setup of an affiliate program for this offer, if desired.
- Defining your thank-you page and email content.
- Activating Physical Product Fulfillment and configuring settings for that.
At any point during those options, you can save and continue to next step.
Set up offer for PayPal Standard >>
To setup your offer in Nanacast.com using PayPal Standard as the payment method, simply select PayPal as the Default Ordering Method, then add your PayPal email address, as shown:
Set up offer for Credit Card >>
To setup your offer in Nanacast.com using a Credit Card as the payment method via your Payment Gateway and Merchant Account, select Credit Card as the Default Ordering Method. You must have a Merchant account configured, as shown:
Click on Manage > Merchant Account
Click Add New Merchant Account
On the Add New Merchant Account page, under Credit Card Gateway, select your gateway.
The configuration steps will vary per gateway.
Click here for more on PayPal Websites Payment Pro Setup
Set up offer for 2Checkout>>
To setup your offer in Nanacast.com using 2CheckOut as the payment method, click My Account > Profile & Preferences, as shown:
Add the required 2Checkout credentials.
Select 2Checkout as the default payment method on the Edit Pricing & Delivery page of your offer.
- The third Product Wizard page is to configure upsells/downsells for your offer. Note that the upsell/downsell offers must already be created in order to configure here. If you haven’t created other offers, this step can be completed later. Save and Continue To Next Step.

- If you have an email list setup at a third-party email or CRM list management service, you can sync it to your Product here on the Edit Third-Party Email Autoresponder Sync page. Select your email list service provider from the dropdown, and complete the configuration for your provider. Otherwise, click Save & Continue To Next Step

- If you want to configure any Notification emails, Activate the Advanced Outgoing API, or setup Custom Fields for the signup process of your Product, you can complete it here on the Edit Notifications and Custom fields page. Again, these are all optional and can be edited later if desired. Click to finish the Wizard.

- In the Finish Product Wizard page, you’ll be provided the following:
- The URL for your Your OPTIONAL Nanacast.com-hosted sales page
- A link to add a new Product Page to your Product
- A link to Create a customized subscription button to place on your own website
All of these can be accessed later from the Product itself via Manage > Products:
- Edit Listing will provide your optional Nanacast.com-hosted sales page URL (also accessed via Manage > Links)
- The New Episode link will add a new Product Page to your Product
- Create Button will allow you to create a customized subscription button to place on your own website (also accessed via Create > Forms, Buttons & Links)
For additional info on getting started, see the following Getting Started FAQ
|
